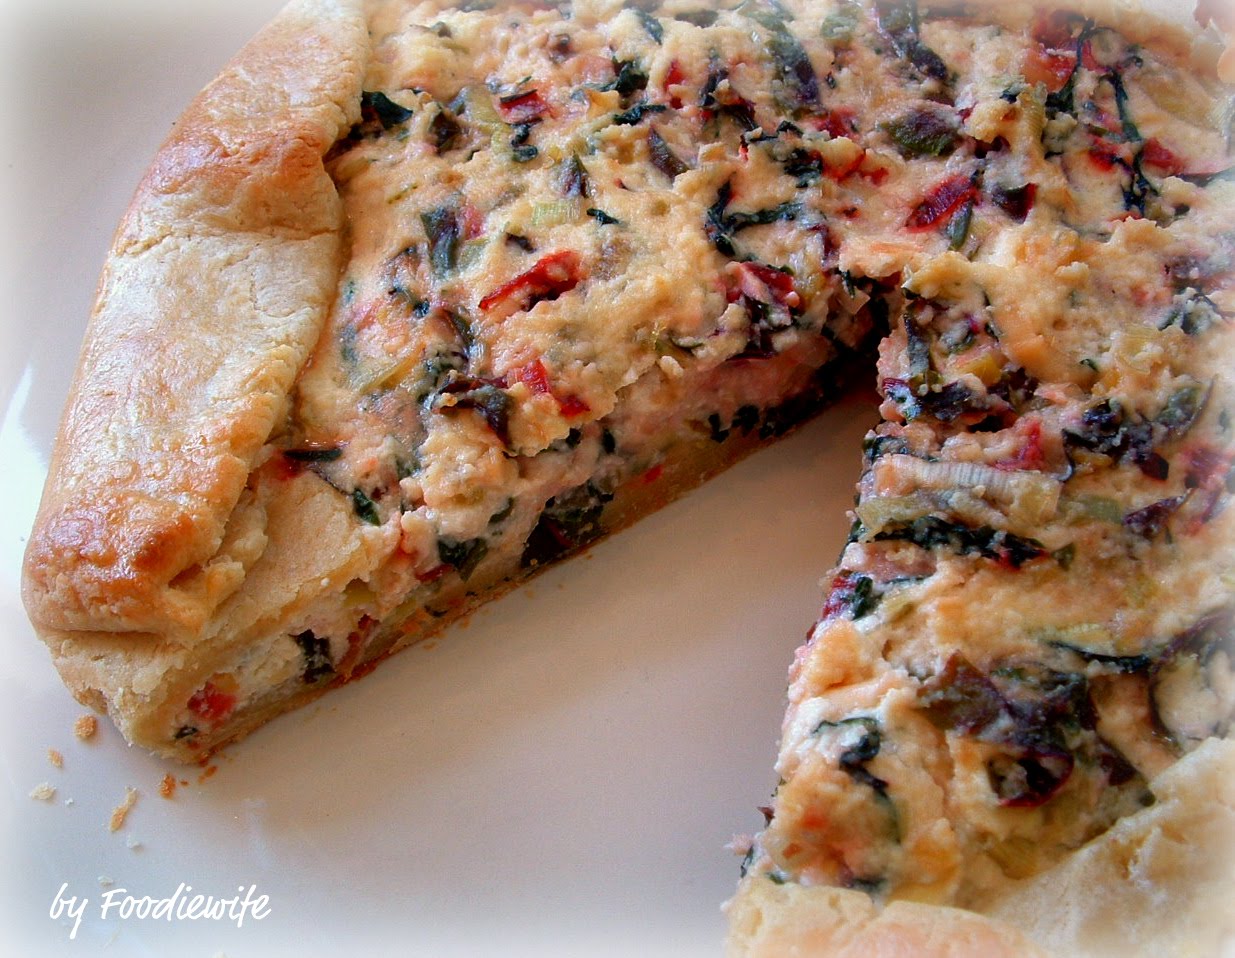
I have heard that if someone is having an Open House, hoping to sell their home, that baking cookies is a way of leaving a warm and homey scent for prospective buyers. I can tell you, that if you make this recipe, that you will return home to find the Realtor, and anyone who has viewed your home, waiting for a slice of this!
I have been a huge fan chef of Anne Burrell, ever since I watched her as Mario Batali's Sous Chef on Food Network's Iron Chef. I record her show, Secrets of a Restaurant Chef, and she never fails to inspire me to try her recipes. Sure, she's a bit zany with how she talks to her food (hello my lovelies...) and how she gr-r-r-r-owls her words when she describes things. Her wild spiked blonde hair is fodder for people to make fun of, but I don't care. The woman is a chef and she can cook! If I could have private cooking lessons from any Food Network Chef (other than Tyler Florence, whom I got to meet and chat with-- and he's totally approachable and talented), I would pick Anne. I love her spunk! On the day that I watched Chef Anne making this savory crostata, my husband had just asked when I was going to cook the Swiss Chard that I pleaded with him to plant. My husband is the green thumb of the family. (I tend to "forget" to water plants. He doesn't.) I was delighted to find a recipe that would be a perfect for one of my favorite leafy greens!
Before I show you how to make this, there are a few key ingredients that you will need. Mascarpone Cheese is a must! It's Italian cream cheese, and it's a little pricey (I paid $4.99 for a tub), but it's creamy and silky...and it's really what makes this crust so tender and flavorful. You need Parmesan Cheese, too. Not that cheap stuff in the green can in the supermarket, please! You can finely grate the cheese in the food processor, or buy it already grated. But, please buy the Parmesan from the deli case. Thank you.
Last night, I made the crust dough, which took all of 15 minutes. That's what I love about my food processor. If you don't own one, roll up your sleeves and use some elbow grease and a pastry cutter.
To unbleached flour, I add grated Parmesan cheese, marscarpone, cayenne pepper (don't skip this, it's perfect) and ice cold butter, cut into small pieces. Don't worry about the recipe. You will find a printable card at the bottom of this post. Pulse, pulse, pulse, until the dough looks crumbly-- like Parmesan cheese. Now add two cold eggs. NOTE: We want cold products so that the butter stays in chunks in the dough. This expands, while baking, creating tender and flaky dough.
Pulse a little more, just until it reaches the "ball" stage. Stop! Remove the dough, and form into a ball, and then gently pat into a disk.
Wrap this in plastic wrap. (See the cayenne pepper flakes? These are going to add to the flavor of this crust.) Put it in the fridge, for at least 45 minutes. I like to do this a day or two before. Less cleanup, less fuss...
Swiss Chard is in season, where I live. it's easy to grow. I bought two large leafs from my local farm stand; I wasn't sure if I had enough growing in our container. You need two leeks. I love leeks. They're a staple in my fridge. Cut it lengthwise and wash it, prying each layer open to wash out any sand. I guarantee, you will find sand! Cut the leeks into thin "half moons".
Cut off the stems of the chard-- this feels like celery, when cutting. Look how much brighter the freshly cut chard stems are! Gorgeous color! Set those aside. Chop the chard leaves and set them aside. Grab two cloves of fresh garlic and some red pepper flakes. It's showtime! With the flat of your knife, smash the clove of garlic. Remove the paper skin, and set them into a pan with olive oil, on medium heat. Add a pinch of cayenne (about 1/2 teaspoon).
Let the garlic cook until a golden brown. Remove the garlic cloves-- as Anne Burrell says, "it has fulfilled it's destiny", so toss it. We now have garlic infused oil, which smells fantastic!
Now, we add the leeks and swiss chard stems and 2-3 Tablespoons of water. Cook, until tender (2-3 minutes) and season with kosher salt (2-3 teaspoons). Please, do not use table salt! You'll write that this tasted like a salt lick. Kosher salt only! Sorry, but I'm passionate about my salt. If you insist on table salt, use less than half of what I do, okay? The water should have evaporated by now. Add the Swiss Chard greens.
Taste the Swiss Chard, and add a little more salt (only if necessary). Let the chard wilt for a couple more minutes. Remove from the pan and set aside to cool. Now, for the filling:
This step wasn't in the directions, but I decided to measure 2 cups of fresh ricotta cheese into a fine strainer. I set it over a bowl, covered, overnight in the fridge. I didn't want to risk any liquid to cause my filling to run.
I add one cup more of grated Parmesan and two eggs...
Give this a nice stir... what's next?
Ah, the crust! Do not be afraid! Crostatas are so forgiving. They are "rustic", so they can look a bit ragged around the edges. Preheat the oven to 375F. You need a baking sheet. If you have parchment paper, I'm going to show you an easy trick. Flour a clean, smooth surface with some flour-- or, flour the parchment paper, that's on top of the clean surface.
From the center of the dough disk, roll away from you. Make a 1/4 turn. No, not you! Turn the dough! (I couldn't resist.) Roll. Repeat. Roll...and so on. There! If you rolled this on parchment paper, just lift the whole thing onto your baking sheet. I love my French rolling pin!
Don't worry about overhang...
You'll see why in a moment...
Now, add the cooled vegetables and give this a gentle stir. I see no reason why this step can't be done ahead of time. So, now let's put the whole thing together...
Spread the filling in the middle of the crust; leave a 3-4" border. This is very important!
This looks good...
Now, fold the edges over. Like this...
An egg wash (whole egg with some water, whisked) will make the crostata shiny and golden. I can hardly wait!
I popped this into the oven for 50 minutes. I wish I could bottle the scent of this crostata, as it bakes! It drove me wild, it smelled so good!
Hello, Lover! Just 15 more minutes for it to cool. I've whipped up a salad for the side...
Fresh strawberries, kiwis and butterleaf lettuce with a honey poppy seed dressing. Delicious!
I am crossing my fingers that this savory crostata is flaky and tastes as heavenly as it smells...
I anxiously cut into this crostata...
Here goes...
VERDICT: If you watch Anne Burrell's show, you know that her arms fly up when she tastes her food. It's a victory dance she does. Well move over. I did a victory dance and moaned and shrieked with delight.
OMG!! The pastry has the perfect balance of nutty and salty Parmesan. The red pepper flakes are perfect. The crust is tender and moist-- this is going in my Hall of Fame Recipe File. As for the filling-- perfection. There was one ingredient missing, to round off this dish. I'll show you...
Ahhhhhhhhh. That's the ticket! A glass of cold white wine rounds out this lunch/brunch meal just right. Life is good. This recipe is better than good. I cannot wait to invite our vegetarian friend over for dinner. I'm definitely making this again. I hope you try this crostata. It's not that hard to make, and you will cook like the pros. Anne Burrell rocks!
Wow! It's 80 degrees and I'm home from work. Mother Nature didn't let me down. Visitors who come to visit the seaside city of Pacific Grove, California complain how cold and overcast summers are. Yes, I know that! I've lived on the Monterey Peninsula since 1963! What I do know is that September is when some of the most beautiful weather comes to this beautiful part of the world. If we're lucky, blue skies and 70 degree temperatures stick around until October. I don't live in Pacific Grove, but I work here. I commute 25 miles inland to where I live in the sunbelt of the Salinas Valley. In this fertile valley, is where I can enjoy plenty of sunshine, strawberries, corn and plenty of summer vegetables for a few extra weeks. That also means that grilling season doesn't end with Labor Day. Pumpkins and winter vegetables will be transformed into pies, soups and stews-- but not just yet! Speaking of Labor Day, these are the ribs that we grilled and they were amazing!
There really isn't a recipe for these luscious ribs. It's all about technique and-- I have come to believe-- in buying quality grass fed ribs (or any kind of beef or pork). This summer, I'm so pleased to say that my husband-- who admits he doesn't like to cook, therefore he can't cook (said with love, Sweetie)-- has been transformed into quite the grill master. I thought we'd share a few tips that have created off-the-hook tasty pulled pork, tri tip and now-- these baby back ribs! I've grilled ribs before and I've tried all kinds of recommended tips. Year ago, I was told to braise them in water and then grill them. Nope, that didn't work. I've oven-roasted ribs, per Tyler Florence. They were good, but they couldn't compare to honest-to-goodness grilled ribs. My best friend, of 34 years, is known for her legendary ribs. At least, that's what I hear, but I had yet to experience them first hand. Two weeks ago, we drove north to the Bay Area to visit. She made them for us and I have to admit they are legendary! She graciously showed me how she does it. It's simple, but it's all about "technique". So, here are the tips we have learned with the help of this book and our own trial and error with grilling:
We enjoy adding rubs to meat. You can buy them at the store or learn to make your own. I've done both.
I like to let the meat come to room temperature before grilling.
Learning to cook meat with indirect heat is the key. As amateurs, we used to throw the meat right on top of the coals-- which led to burned meat/sauce and mediocre results. Now we understand to cook it low and slow.
We never baste the meat with sauce, until the very end-- if at all.
Soaking wood chips and then adding them over coals creates a flavorful smoke. It kicks the flavor up a few more notches.
It's worth an extra dollar or two, per pound, to buy quality meat. If you're always looking for bargain meat prices, try buying from a reputable butcher who sells grass fed meat. Trust me, you'll truly taste the difference. Whole Foods ribs cost $1.00 more, per pound, than my local large grocery chain. No hormones and free-range.
Pat adds some garlic salt & seaoned salt. Instead, I added some Susie-Q Brands Seasoning mix. I love this product!
Rub, rub, press. These ribs are well seasoned and ready for the grill. I have photos on my pulled pork post, that shows you all about indirect heat grilling and adding wood chips for smoky flavor. Like my best friend, Pat, did-- we cooked these for about 1 1/2 hours, with the Weber grill cover on, with the meat away (not on top) of the coals. Halfway through cooking, we added more coals. We added the soaked Susie-Q Red Oak Wood Chips to the coals for the last 15 minutes.
The meat has pulled away form the bones, and it's ready!
Look at that color, from the rub!
How off-the-bone tender does this look?!
I basted half of the ribs with my homemade barbecue sauce. Personally, I prefer no sauce, because I want to taste the flavor of the grill, oak chips, rub and seasoning.
Of course, I had to make another batch of compound butter with fresh cilantro, fresh lime juice and Susie-Q seasoning. I give thanks to my best friend, for showing me how to make ribs her way.
The barbecue sauce recipe is at the bottom of this page. I really like this one, if you enjoy a tomato based sauce with some flavor kick and garlic. Yummy!
Juicy, Perfectly Seasoned & Oak Grilled Tri-Tip with a lot of help from Susie-Q's products.
Traditional Santa Maria Pinquito Beans from Susie Q's Brand
Labor Day can be a bittersweet farewell as summer is ready to pack up and leave us until next year. Already, my cooking magazines are featuring roasted turkey recipes and pumpkin pies! Excuse me? We folks on the Central Coast of California are just now gearing up for our typical Indian Summer weather! My Weber grill is still longing to be fired up! My local farm stand is still picking luscious strawberries and there are still plenty of corn stalks waiting to be harvested and thrown onto the grill. That's exactly what we will be doing for this three day weekend. My soups and stews recipes can wait a few more weeks-- as far as I'm concerned, we love to grill year-round. Period.
A few weeks ago, I received a lovely email from "Christopher". Apparently, he spotted my blog post on my version of Santa Maria Style Tri-Tip. He asked if I could like to try some of Susie Q's Santa Maria seasonings. I thought about it for a non-second and immediately replied "please and thank you". I received the box above. I wanted to wait for a sunny day to grill outside. For those of you who live in my area (Monterey, California), you can vouch for the fact that we have had an unseasonably cool summer with lots of fog and overcast skies. This weekend blessed us with the perfect grilling weather, so I headed off to Whole Foods to buy tri-tip. For those of you who are unfamiliar with this cut of beef, tri-tip is a cut of beef from the bottom sirloin primal cut. It is a small triangular muscle (hence, the name), usually 1.5 to 2.5 lbs.
I have recently discovered two important things about what kind of beef (or any meat) I buy: #1 - If you can buy grass fed beef (rather than grain fed), it's totally worth it. I've become more aware of what is being fed to what I plan to consume (just watch the film "Food Inc" and you will understand). I can taste the difference in flavor and texture. Seriously! #2 - Grass fed beef is becoming more widely available in grocery stores. I'm fortunate to live near a Whole Foods. $6.99 a pound, to me, costs more than grain fed beef. Still, I think it's worth spending a few dollars more. Since I was cooking for 2-3 people, I bought a small piece-- this one weighs less than 2 pounds. (If you'd like to more info on why grass fed beef is healthier for you, you can click here.)
First, I made the beans. These are Santa Maria Pinquito beans. This is the first time that I've tried them, as I cannot find them in my area. That's probably because, Pinquito beans grow well in the fertile soil and mild climate of the Santa Maria Valley, which is the only place where pinquito beans are grown commercially.
They resemble pink beans, only a little smaller. I sorted and washed the beans. Then, I opened the seasoning packet. There are a lot of spices and aromatics going on!
Per the instructions, I added water and gave it a stir. I brought the beans to a boil, covered them and let them simmer. The instructions said for two hours, but I allowed for three. Easy! 30 minutes before starting the coals, I brought the meat to room temperature. I seasoned the tri-tip with Susie Q's Santa Maria Style Seasoning.
So, what makes this Santa Maria Style? Santa Maria Style Barbecue requires a specific preparation. The favored cuts of meat are top block sirloin and tri-tip. Before cooking, the meat is seasoned with a special blend of salt, black pepper and garlic salt. The meat is then grilled over coals of red oak, a wood that is native to the region, giving the meat a hearty, smoky flavor. The seasoning smelled wonderful as I took a whiff of it. I was inspired to make a compound butter for grilled corn:
To one stick of butter, I added some of the seasoning (I "eyeballed" it... a couple of teaspoons, I'd guess). I added fresh chopped cilantro and some lime juice. I debated adding some chili powder, but I figured the beans would be spicy enough. I chilled the butter, until it was time to serve the grilled corn. Speaking of grilling-- I didn't photograph the process of setting up the charcoal or soaking oak chips, since I've already blogged that part. (You can always view it here.) Once the meat was seared over direct coals, Craig added the Susie Q's Red Oak Chips, that had been soaked for about an hour. The meat was moved to indirect heat (to the side away from the hot coals). Ah, the smoke is building!
I live in the Salinas Valley of California-- home of one of the biggest Rodeos in the World. I grew up riding on ranches, have owned horses and have hung out with plenty of cowboys and ranchers. I've been fortunate to experience authentic ranch style barbecue. Nothing beats cooking over authentic oak wood! It's such a great flavor. But, I now live in the 'burbs. A Weber grill will just have to be a substitute. Craig grilled the meat until it reached 130F (we like ours medium-pink) and we let it rest, knowing it would continue to cook.
Craig has mastered the art of making great corn. He microwaves the corn, in the husk, for 3-4 minutes per ear of corn. My brother joined us for dinner, so we cooked three years. After 8 minutes, he lets them cool enough to peel back the husk. They are grilled until lightly golden, using the husks as a handle.
The corn is rolled around so that the cilantro-lime butter is evenly coated...
The beans! Let me tell you a little about those. We like our beans a bit thick. After three hours, of a low simmer, they were definitely ready. At first, I tasted heat... as in spice. But, then my tongue adapted and I could taste a background of smoky cumin. Still, I didn't want watery beans. No problem. I ladled out a lot of the liquid and then pondered what to do. I finally decided to make a slurry of some cornstarch and water and whisked it into some liquid. Once it thickened, I slowly added it until the beans were thick-- to our liking. My brother quickly ate the bowl of beans I had photographed. He loved them!
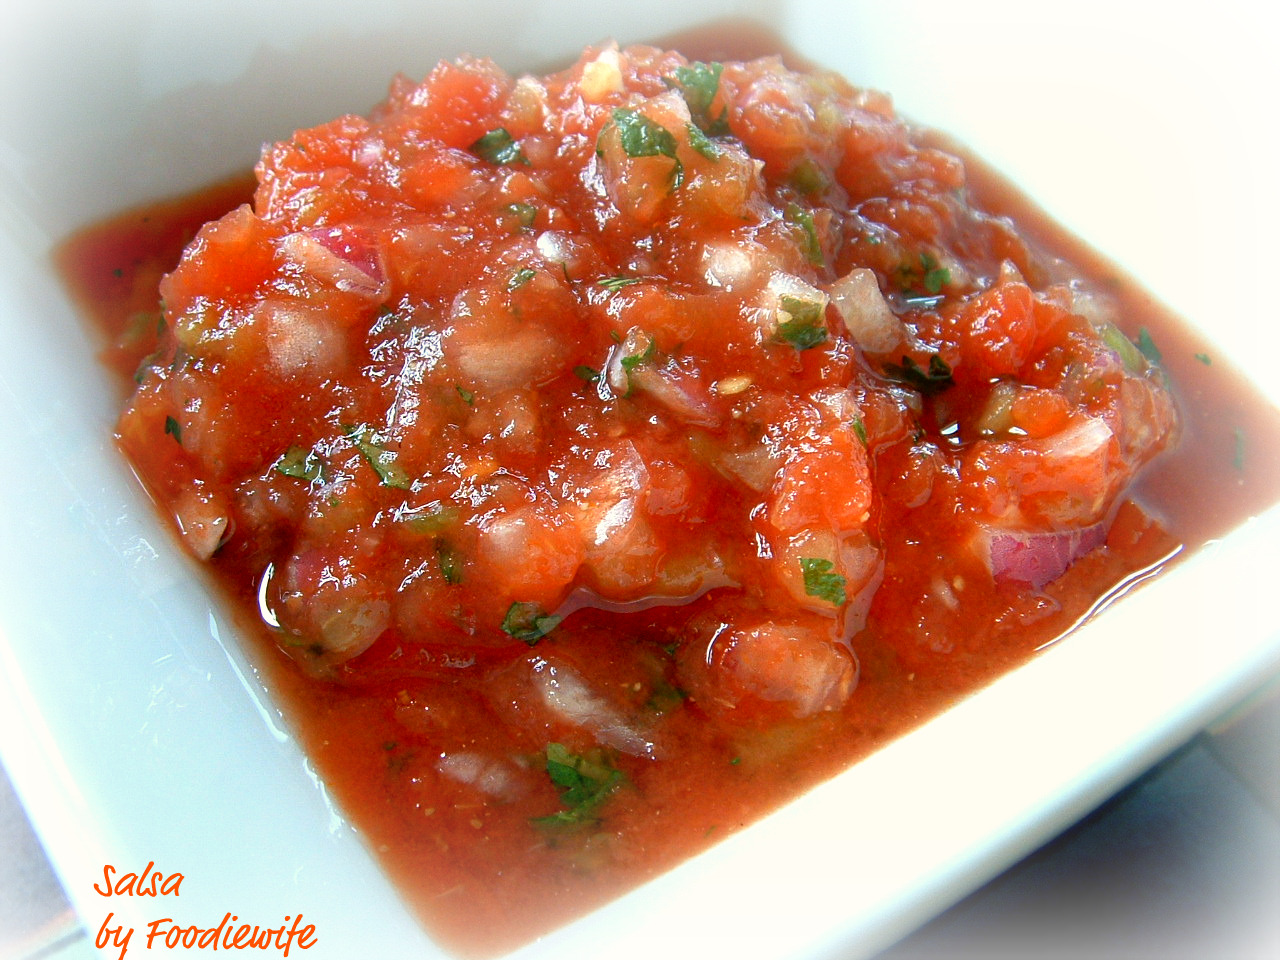
Of course, I had to make the Pioneer Woman's Restaurant Style Salsa.
Now, for the moment of truth on the Tri-Tip...
My husband, who really doesn't like to cook (and swears he can't) has really learned how to grill meat. This is exactly how we like our beef to be grilled. It's a perfect pink!
I had to blow up this shot. Please tell me you can see how juicy this slice of beef is! I took a bite...
VERDICT: Let's start with the beef. (Doing a happy dance). The seasoning is spot on! It's not too salty, not too much garlic. The pepper ratio is perfect. To me, Tri-Tip doesn't need sauce. No way! The meat is tender, and the smoky oak flavor... I can almost hear the cattle lowing, the cowboys are coming home! This is Santa Maria Style barbecue. The corn was sweet and tender and the seasoning was perfect for the cilantro-lime butter. The beans were a hit. The oak chips are such a treat for adding a smoky flavor, even with a weber (or you can also make a foil smoke packet for a gas grill). I still like my other version of Santa Maria Style Tri-Tip, but I think this is easier and-- dare I say-- I think it's better!
Craig and I live less than four hours from Santa Maria, California. The next time we drive south, I hope that we can visit to the family restaurant, at the Far West Tavern. I hope that's sooner, rather than later.
It has been almost two weeks ago, since I created this dessert. I must make this again...and again! My inspiration to make this dessert started when I spotted the late first arrival of figs at Whole Foods.
I've made Fig Jam, Grilled Figs and other savory fig dishes before. But I really hadn't made something sweet. But what? So I scoured the internet for inspiration, and landed on Martha Stewart's Panna Cotta recipe with figs. Then, I stumbled across a recipe for Fig Brulee with Balsamic Vinegar on Herbivoracious. That was it! I would make all three components. Martha makes a bourbon caramel sauce. I'm not a bourbon fan. But, I do like Grand Marnier. I rolled up my sleeves and started making the panna cotta. I have made Panna Cotta several times. For those of you who aren't familiar with this Italian dessert, think "cooked cream". I think of this dessert as an eggless custard, which has endless possibilities. I've made this with 1% milk, 2% milk, Half & Half, buttermilk and a mixture of all three. This is the first time I've abandoned any attempt at trimming calories and fat-- I made this with heavy cream. I've also skipped the ice bath step, but this time I decided to follow Martha Stewart's instructions. I've prepped my ingredients and I'm ready to go!
I began with 3 cups of heavy cream and 1/2 cup white sugar. Next, I "bloomed" unflavored gelatin with water....
The gelatin is added to the simmering cream. The gelatin dissolved in a couple of minutes. While the creme was heating, I prepared an ice bath. Next, I poured the hot cream into a measuring cup and then into placed the ice bath.
I whisked the cream mixture until cool, 6 to 7 minutes. Add real vanilla extract (you could use vanilla bean, but I didn't have one on hand) and 2 Tbsp of Grand Marnier.
Chill for a minimum of 2 hours, or covered for up to 3 days.
Making caramel sauce made me a little nervous. It has been a long time since I've tried, but I decided to go for it. The first batch turned out way too dark. That's my fault... I got distracted and the sugar burned. A word from someone who is wiser-- organize the sugar, water and heavy pan and just don't walk away. Now that I did it twice, I've conquered my fear of caramel.
As you can see, the top left sauce is a bit dark. Burned sugar is bitter. The bottom right is the successful version. It's a pretty amber color.
This sauce is not made with sugar, heavy cream and butter. Instead, this sauce is thinner and clearer-- much like a caramel flan sauce. I tried to photograph the steps, but it's too hard. You have to work fast, so you can click here for a great photo tutorial (Simply Recipes).
Now, for the figs...
If you have a brulee or kitchen torch, you are in for a treat!
I have to tell you, these are a beautiful presentation...and they taste amazing (you can even add balsamic vinegar for a ta-da).
To unmold panna cotta, dip ramekins in warm water. Run a paring knife around edges of panna cotta to break seal, and invert each ramekin onto a dessert plate. Dessert will slowly slide out.
Add the caramel sauce and garnish with figs...
VERDICT: Wow! First, the panna cotta is very silky. Heavy cream is the way to go. This is my tastiest version yet. I didn't detect much Grand Marnier in the panna cotta, so either kick it up more or leave it out altogether. The caramel sauce! Oh, that was pure bliss for me. I love caramel in every way. The sauce is light, and the Grand Marnier was just right-- subtle and not overpowering. The figs.... the texture of the caramelized sugar added a great crunch, followed by the creaminess of the panna cotta. This dessert makes a statement, and I want it again!
I actually hid one ramekin of panna cotta, but my son found it. He feels no shame, either. Well, good for him!
As for the caramel sauce-- I did refrigerate it for two days and it did turn thick. I made another dessert with this, which I will share next. I am wicked, huh? Forgive me.
All three recipes are at the bottom of this page. This is the panna cotta recipe that will become my "go to". The caramel sauce is perfect for this dessert. Don't be afraid. You can make it, too!


 !
!