I'm such a visual person. Truly, I am. For example, I had a meltdown today. I lost an old friend. My camera died. The new batteries and charger didn't revive it. My inexpensive Fuji Fine Pix camera gasped it's last breath and I felt very sad. I had plans to make a spectacular (in my mind) new dish, but I put the ingredients away. I wanted to photograph how I made it! I've spent two years building a habit of photographing just about everything I make-- at least, dishes I've made for the first time. Are you feeling me? My husband isn't. Especially when he saw me headed off to the mall to buy the camera that has been on my radar for at least a year. It's a financial splurge, for sure. I tried to justify the expense by telling him this is my early Christmas present for the next two years. I am now the proud (and very happy) owner of a Canon EOS Rebel T1i Camera!! The timing is perfect (and a total coincidence, I told my husband). You see, I am headed to San Francisco this Friday for two glorious nights and three wonderful days to attend the Foodbuzz Festival 2010. So, it's a good thing that I photographed this frittata yesterday morning. It's the last photo that my old camera took for me. I was inspired to make this dish, when someone (thanks "Margo") posted this recipe-- which goes back to my being visual. After reading that particular recipe, I decided to do my own version and change things up quite a bit. Therefore, I will claim this particular dish as my own creation. The first step was to peel and slice 2 small sweet potatoes.
I added a little bit of water and covered the bowl with plastic wrap. I microwaved these for about 3 minutes. In the meantime, I sliced on half of a large onion and began to caramelize them with a little bit of olive oil.
I cut some fresh thyme, from my garden and I went to cut some fresh sage. Only, my beloved sage bush had died. It was shriveled up! Wailing (well, that's a little melodramatic), I used dried sage, instead.
The onions cooked for about 10 minutes (for a very light caramel color), and then I seasoned them with coarse salt & freshly cracked pepper.
I removed the cooked onion from the skillet, and set them aside.
I added a little more olive oil and a pat of unsalted butter, then layered the sweet potatoes evenly. By the way, I believe these are technically yams. But I'll call them sweet potatoes for familiarity.
I flipped them over after 2 minutes, or so, when they were nice and golden. While they were cooking, I cracked 8 eggs and added 2% milk and whisked them really well.
There isn't a picture of this, is there?
I took a few. So, you see, my camera was beginning to do weird stuff. It never uploaded, I tell you!But y'all know what a bowl of whisked eggs looks like, right? Season them with salt & pepper. You can add a handful of grated Parmesan, but I had something else in mind..
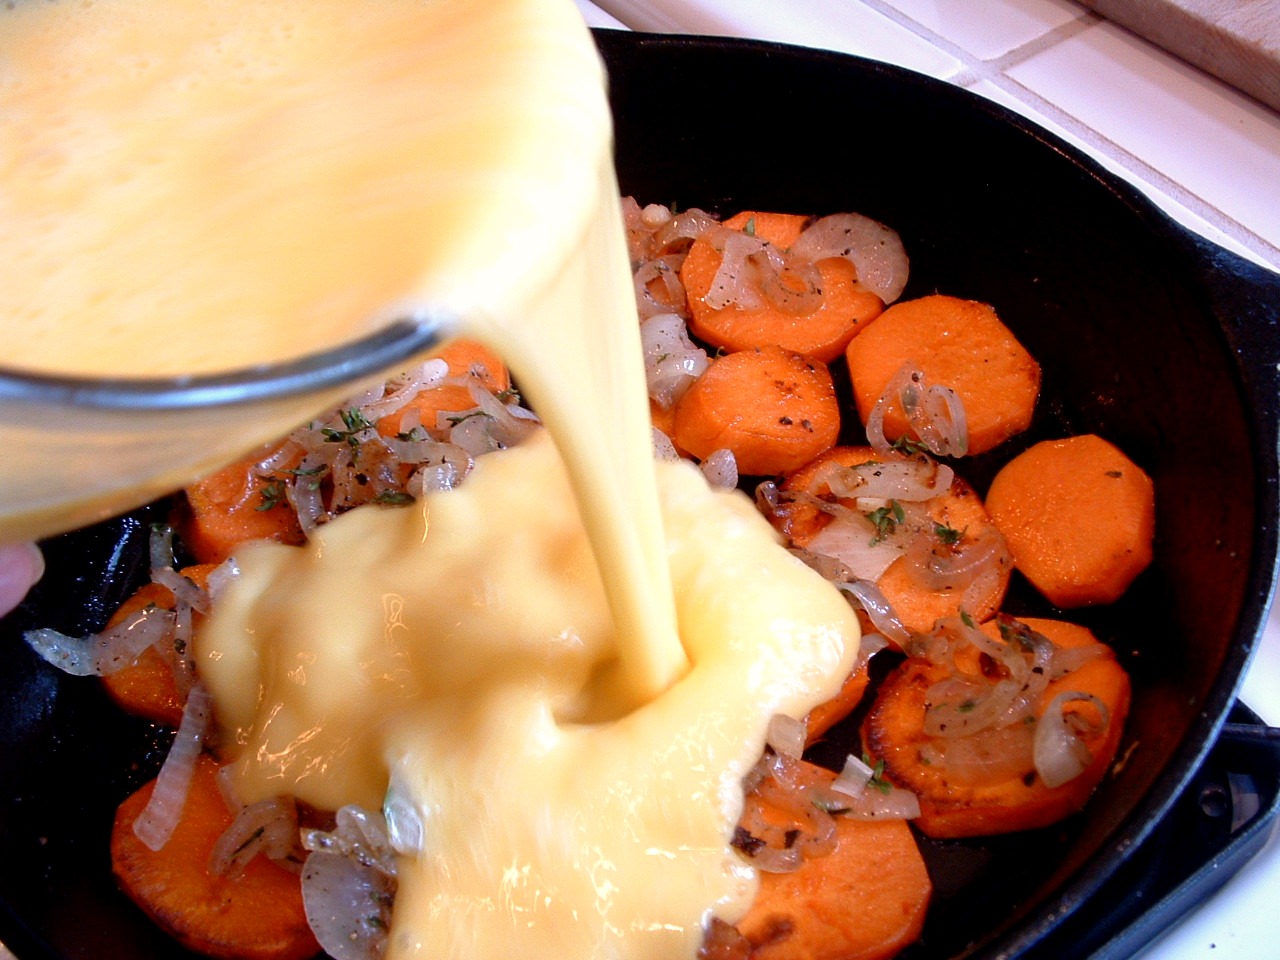
I buy this wonderful cheese blend at Trader Joe's. If you don't have one nearby, use a cheese blend of your choice. This blend has Fontina, Asiago, Parmesan and Mild Provolone.
The onion is layered on top...
...and the egg custard is poured evenly on top.
...and the skillet is placed into a 375F oven for 15 minutes.
...or until set. The eggs shouldn't be jiggly. I guess you could call this a "crustless quiche".
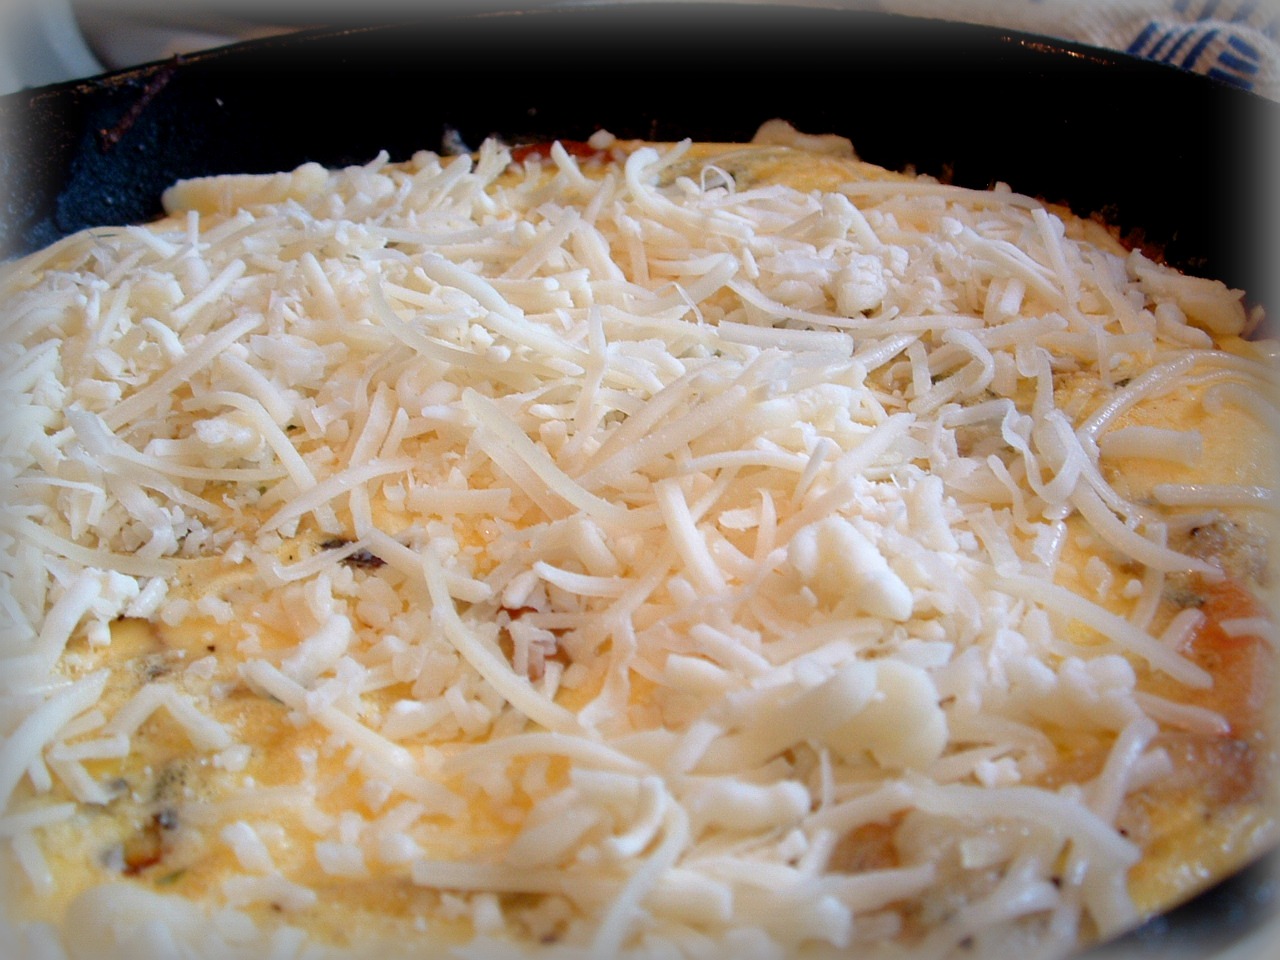
You can leave out the cheese. Otherwise, put a layer of cheese on top and set the rack high and turn on your broiler...
Broil for about one minute, or until nice and bubbly...
...like that! Allow to sit for 5-10 minutes, before cutting.
I took some nice shots of the skillet, showing the layers. Only, my camera didn't upload them.
But, take my word for it This was delicious.
VERDICT: My son hates sweet potatoes. Seriously, each year he eats one bite of my sweet potato casserole and shakes his head. He took a bite of this and swallowed it With wonder in his voice, he asked if these were sweet potatoes (well, yams). When I nodded, he raised his eyebrows. Then, he polished off his piece and went back for seconds. Me? I quickly wrote down the recipe so I could share it with you, and make it again
If I don't have time in my busy work week to post another recipe, I'm sure you'll be hearing from me as I meet 350 fellow food bloggers, this weekend. San Francisco has a very special place in my heart. It's where I studied Esthetics and got my cosmetician license. It's also a stone's throw from where my BFF lives. After two years of emailing and occasionally calling Monica, of Lick the Bowl Good-- we are going to meet face-to-face for the first time. We're also going to be partners-in-crime roommates.
In a way, I thank my old camera for picking this weekend to kick the bucket. I'll be attending a photography seminar, and I can take my new Canon on it's maiden voyage. Who knows? Maybe I'll see a Victory Parade in downtown San Francisco if when the Giants win the World Series!
This soup is a miracle. I'm not kidding. You see, I was one of those picky kids, who refused to eat cooked carrots. I'd rather be denied dessert, than to eat the boiled carrots my mother would sometimes put on our dinner plate. For most of younger years of life, I continued to pick the carrots out of any kind of "vegetable medley". As I began to blossom into a grown woman, I began to eat carrots to be polite. Still, I didn't really care for them. Well, now that I'm a self-proclaimed "Foodie", it's time for me to try and overcome my childhood aversions. The first step was the Glazed Carrots that I made a couple of years ago. Success! Still, I continued to feel disappointment if I saw "Carrot-Ginger Soup" as the soup of the day on a restaurant menu. At my office, I was the sole person who didn't rave about what a delicious soup this is, when someone recently said how much they love Carrot-Ginger Soup. You see, I've never tried it. Yes, t'is true. So I decided to do a little internet research and I realized that this soup is very easy to make. An idea was born! I gambled that if I roasted the carrots, first, that I just might kick up the flavor a notch or two! I decided that I wouldn't peel the carrots. Why bother? I'm going to puree them anyway, and don't the experts say that's where most of the nutrients are? Sounds good, but truth be told-- it was less work, and I liked that. So, here we go:
Preheat the oven to 375. I had five organic carrots from Whole Foods. On sale, no less. Wash the carrots and cut off the bottom root end. Place the whole carrots (or you can cut them lengthwise) on a baking sheet, and drizzle with olive oil. Roast at 375 until tender and caramelized (shake the pan about halfway through to evenly roast); about 45 minutes. Set aside.
Look at the caramelization on these babies! I cut a piece and tasted it. Wow! They are sweet, and resemble the texture of baked sweet potatoes. NOTE TO SELF: Add salt & pepper, sometime, and eat these as a side dish. They are a whole new animal, when they are roasted!
But, I'm making soup... Carrot-Ginger, to be specific.
Dried ginger doesn't compare to freshly grated ginger. I love it!
I decided to dice two shallots (about 3/4 cup) because I like their milder flavor. Yellow onions would do nicely, though. I diced two ribs on celery, 1 clove minced garlic (not pictured) and grated about 2 teaspoons of fresh ginger. Okay, it's showtime!
In a Dutch Oven, I heated some olive oil and a pat of unsalted butter. I sauteed the shallots until tender (about 2-3 minutes) on a medium heat, being careful not to burn them.
Next I added the celery, ginger and garlic. For seasoning, I used coarse salt and about 1/2 teaspoon of white pepper. (Black pepper would do, but I wanted to keep the orange color free of color.)
I love to make my own chicken stock, but I'm out of it for now. I always keep a reserve of quality chicken broth on hand, so I grabbed a 1-Quart box. (You can easily replace this recipe with vegetable stock.) I added the roasted carrots into the pot and half of the chicken stock. I brought the soup to a light simmer and then I used my immersion blender to puree the vegetables together. NOTE: If you are using a blender, then you will need to puree this in batches. Be very careful to put a towel on the lid of the blender, so you don't have an accident. Personally, I recommend buying an immersion blender. It will make your life a lot easier, if you love pureed soups as much as we do!
The pureed carrots became pretty thick, so added the rest of the chicken stock-- one quart, total. At this point I added some coarse salt as seasoning and a little more white pepper. Hmmm. I wanted even more flavor. Ah! White wine! I added a big splash of sauvignon blanc (about 1/4 cup). Better, but I wanted more flavor. Then it hit me-- orange juice! I added a splash of fresh orange juice (slightly less then 1/4 cup). That was it! I cut fresh chives from our herb garden, as a garnish.
I turned the soup on low heat and whipped up a quick batch of skillet cornbread....
...and then I took my first taste of Carrot-Ginger Soup. The miracle happened. I smiled. I liked it! VERDICT: Speaking for my husband, he asked me what was in the soup. He said it had delicious flavor, but he questioned if it was really carrot soup. He said it was sweet, creamy and flavorful. He ate two bowls, as did I. This is guilt-free soup, because it's creamy without any kind of heavy cream added. The balance of ginger was very subtle. The natural sweetness of the carrots was the star, but you could taste a mild heat of the ginger as you swallowed. But there was a second miracle-- my son, who has inherited my picky palate when I was his age-- he ate two bowls. He loved it.
I see future variation possibilities for this soup. Sometime, I will add a can of Lite Coconut Milk, and some fresh lime juice. Yeah? A garnish of cilantro will bring this home with Thai flavors.
So, miracles can happen when someone makes a decision to overcome childhood aversions. Do you have a picky carrot eater? Give this a try! Let them guess what's in it. Maybe you'll change your mind. I did!
Rain is forecast for this weekend, so I have more soups to come!
I'm submitting this recipe to Souper Sundays, hosted by Deb at Kahakai Kitchen. This is the perfect place to come and see what other bloggers are making for the Fall Season!
Organic foods have become very popular and mainstream within the past few years. Everyone knows that their are certain fruits and vegetables that should be purchased organically (see the dirty dozen and clean fifteen list), but what about meats, should they also be purchased organically? If you walk into any grocery store you'll notice that there are a lot of chicken, turkey, and other meat products labeling themselves as "all natural". That statement sounds really healthy, but it's simply false advertising. It seems anything can be labeled "all natural" as long as it's actually naturally the meat itself. In order to get the healthiest product, look for certified organic meat products as opposed to the all natural slogan. I understand it's more difficult to siphon out all of the all natural products and locate the organic meat product, but it's worth the search when it comes to your health.
Organic meat such as chicken is not a product of mass production and thus contains all of the natural nutrients without the hormones and additives and it simply tastes much better. Chickens that are fed hormones and antibiotics transfer those same hormones and antibiotics to the humans who are consuming those chickens. The antibiotics and hormones could make bacteria and infections more resistant to treatments and actually create stronger strains of bacteria within the consumer. The antibiotics could make bacteria and infections more resistant to treatments and create stronger strains of bacteria. Organic chickens are fed a regular meal that consists of grains and then the chickens are able to roam and find food on their own. They eat insects, leaves, seeds, or maybe even some small fish or shellfish. Since the chicken eats foods actually provided by nature the chicken has a higher amount of beneficial fats that lower cholesterol, and higher amounts of Omega-3 Fatty Acids and Vitamin A. Chickens that are not organic are given regular doses of antibiotics, vaccines, and other medications in order to become bigger at a faster pace. Organic farmers also benefit compared to chemically altered chicken farmers because they don't have to purchase all of those drugs and they can simply watch the health of their chickens in their own natural environment. The chickens get more exercise and this makes their nutritional content increase and the flavor of the meat exceeds. Organic chickens are not only good for consumption but also for the environment itself. Organic chickens eat insects and vegetation which affects the ecosystem. So search high and low for organic chicken and don't fall for the "all natural" label, just remember that it's "actually chicken meat". The health and flavor benefits you'll be giving your body outweighs the extra searching and few dollars.
Living on the Central Coast of California, our change of seasons happens in a very subtle way. Ground snow doesn't happen in my part of California. Instead, our golden hills begin to show signs of life again with patches of bright green grass. In our backyard, our tomato plants are beginning to look tired. There are a few orbs of red tomatoes, but plenty of green tomatoes. Alas, they are small tomatoes-- too small for making Fried Green Tomatoes. We've had a couple of days of welcome rain, but the sun still makes an appearance. I noticed a few roses decided to show their pretty colors, though the rose bushes are starting to look a little sparse. Our sugar pumpkins are not doing so well. (That's what happens when you plant them a little too late.) Fortunately, the pumpkin shortage that was predicted has been lifted. I've run out of the frozen pumpkin puree I made, last year. So, I'm back to stocking up on canned pumpkin. I can eat pumpkin year-round. Sweet or savory, I'm always looking for new ways to enjoy this winter squash (or is it a fruit? or vegetable? I bookmarked this recipe a few months ago, from the King Arthur Flour website.
KAF's recipe for Harvest Pumpkin Scones, suggests adding crystallized ginger. I haven't used this pretty (but deadly "hot" to my tender palate) product in a long time. My son grabbed a piece of this, and before I could warn him, he took a big bite. The look on his face was total shock, and tried not to laugh at him too much. Don't let the sugar fool you! Ginger can be very hot to the taste buds. A little goes a long way! If you've never made scones-- or your attempts yielded desert dry and hard hockey pucks-- I'm going to show you how fast you can make these, with a few tips and tricks along the way. Ready?
First, we measure our dry ingredients. NOTE: I forgot left out the allspice. I used it up making my famous Red Cabbage, last week. Full disclosure: I am not an employee of King Arthur Flour, nor do they pay me or provide free products. I am a regular customer, though. I simply love their baking products because of the quality of their ingredients. You don't have to add crystallized ginger (I found this in the bulk section at Whole Foods) ...
...nor mini cinnamon baking chips (purchased online at King Arthur Flour). But I recommend it. You need pumpkin puree. Don't use canned pumpkin pie filling, by mistake! (Why does anyone even buy that? Pumpkin pie is so easy to make...just sayin'.)
I decided to use 1/2 cup of minced crystallized ginger and 1/2 cup of mini cinnamon chips-- half of what the original recipe calls for. You need 2/3 cup of pumpkin puree. Puree freezes really well, in case you don't use the rest for something else in a day or two. You need two eggs. Cold eggs. More on that, in a moment. Now, we need butter. Not margarine, please. Butter. One stick. Cold butter. Do you see a theme here?
Here's a great tip:Grate the butter. Put it in the freezer to keep it ice cold. So, what's up with the emphasis on cold, you might wonder? Unlike baking cakes or cookies, scones turn out puffy and tender when the ingredients are very cold. The chunks of butter create steam, just like when baking with puff pastry or pie crusts.
I don't think it matters what order you do things, but I whisked the eggs and then combined the pumpkin puree. I put that in the refrigerator, to keep with the cold theme.
So, now all the ingredients are prepped and ready to make scones. This shouldn't take more than 15 minutes. When you're photographing step-by-step, it takes more than twice that time. But, you readers are worth it. Stir/whisk the dry ingredients. A pastry cutter helps. (The warmth of your fingers might warm the butter up.)
Work in the grated, cold butter just until the mixture is unevenly crumbly; it’s OK for some larger chunks of butter to remain unincorporated.
If you're using the cinnamon baking chips and crystallized ginger, add them in now.
Add the pumpkin/egg mixture and stir until all is moistened and holds together.
At first, I found that my dough didn’t turn out very moist. Don’t panic, if it does.
I gently worked the dough until it held together. If you overwork the dough, you will end up with tough scones.
Line a baking sheet with parchment; if you don’t have parchment, just use it without greasing it. Sprinkle a bit of flour atop the parchment or pan. Scrape the dough onto the floured parchment or pan, and divide it in half. Round each half into a 5” circle (if you haven’t incorporated any add-ins); or a 6” circle (if you’ve added 2 cups of fruit, nuts, etc.). The circles should be about 3/4” thick. * *NOTE: I found that room was “tight” to place two circles onto one baking sheet. Even though I spaced them, they spread out and fused a bit together. I recommend using separate baking sheets.
See those bits of butter, ginger and chips? Yes! At this point, I put the baking sheet into the freezer for 30 minutes. That's the perfect opportunity to clean up the kitchen. Get ready to preheat the oven to 425F. (The high heat gets that wonderful, buttery steam going.)
30 minutes later, the baking sheet and the unbaked scones are ice cold. I brushed each round with milk and a sprinkling of coarse bright sugar.
NOTES: King Arthur Flour does the aboves steps before freezing. I chose not to, for no particular reason. Maybe I couldn't bond with the idea of freezing the milk... either way, it worksout fine. Coarse bright sugar is one of my (many) favorite King Arthur Flour baking products. This sugar gives a wonderful texture to my muffins, puff pastry goods, cookies and scones. If you can't find it (you can buy it here), you can substitute a cinnamon-sugar topping.
I love my bench scraper tool! Since the dough was very cold, from the freezer, I found cutting the rounds into wedges was pretty easy.
Carefully pull the wedges away from the center to separate them just a bit; there should be about 1/2” space between them, at their outer edges. Bake the scones for 22 to 25 minutes (mine took 20 minutes), or until they’re golden brown and a toothpick inserted into the center of one comes out clean, with no wet crumbs. If you pull one of the scones away from the others, the edges should look baked through, not wet or doughy.
NOTE: To be on the safe side, I checked the scones at 20 minutes, and the aroma was amazing! They were very ready!
NOTE: Seriously, spread them apart! Mine fused slightly together (see previous note). In the future, I will use two baking sheets. Just sayin’!
Get your coffee or tea ready. You won't have to yell "ready". The aroma will bring anyone in the house right to the source of the pumpkin-ginger-cinnamon aroma!
Serve while warm.
VERDICT: Like Ina Garten and Cook's Illustrated, I've yet to not have success with a King Arthur Flour recipe. The scones were tender and crumbly. The ginger was the dominant flavor, so I plan to cut back to 1/4 cup instead of 1/2 cup. I'm so glad I didn't add a full cup of ginger, or these would be renamed "Gingerbread Scones". The cinnamon chips were very subtle, so I will increase from 1/2 cup to 1 cup. The pumpkin flavor is very subtle, but I attribute that to the power of ginger. Next time, I will definitely add the allspice. I just love the crunch of the coarse sugar, but I might try the cinnamon-sugar topping instead. Overall, these are delicious scones. They would be perfect for a Thanksgiving morning brunch.
You can warm these up in the microwave, for a short burst of time. Or, in a toaster oven. I am thinking that these could be made the night before and refrigerated. The next morning, I'd add the milk and coarse sugar (or cinnamon-sugar topping) and bake them as directed. I would be tempted to par-bake these and freeze them. Then, you could try baking them until golden brown, at a later time.
The printable recipe is at the bottom of this post. Since I've baked these, the sun has disappeared and we're back to grey skies. Maybe it's not such a bad idea that we put fresh flannel sheets on our bed. I do think that the frost on the pumpkin might be coming in the next few weeks! In the meantime, what do I do with tiny green tomatoes?