Monday, May 31, 2010

California Black Bean Huevos Rancheros with homemade salsa

Saturday was a very special day for me.  My Arabian horse came home, after two years of living on a ranch in Paso Robles.  It was a matter of economics, and an offer I couldn't refuse, to move her 120 miles away.  "Savvy" has been well looked after and she was doing well. The problem was, I wasn't.  I found myself longing to brush her, feed her carrots, nuzzle her mane and to appreciate what only a true horse person can understand-- that "equine smell" of horse sweat, with notes of mustiness and ... well, horse. As luck would have it, someone I have known for decades owns a ranch about 12 miles from my home.  Charlene graciously offered to trailer my mare for the two-hour long haul back to Salinas, California. Excitedly, I called out to my girl, "Savvy!!" and I could hear her whinny as the trailer pulled in to her new home.  She unloaded a bit stiffly, so we took her into the arena.  It took less than a minute for her to sniff, paw and find just the right place to buckle her front knees and plop down for a good roll.

Savannah Sue, has officially checked out her new home and I was grinning from ear to ear. I missed that 27 year old horse more than I imagined!   Her new digs are quite lovely, I must say.  It's also a good 20-30 degrees cooler. I wilt in weather that is higher than my coastal 70-80 degrees. While Savvy got to sniff around, and her new neighbors came to check her out....

...we drove up to the main house. The owners are away at their second home in Hawaii. Nice, huh?

The top right photo is not a small house. It's a "Chicken Condo".  I'd say that there won't be a coyotes, foxes nor or any kind of predator that can get to these chickens!  Next door, is a more typical chicken coop with Mr. Rooster. The caretaker handed me a carton of fresh eggs, freshly laid that day!  Score!!  After brushing my horse, and feeding her carrots, we headed home.  I felt like all is right with my world, just  knowing that my horse was 15 minutes away from home.  
This morning, I pondered how to enjoy these eggs.  If you've never tried farm fresh eggs, I can tell you that the yolks are more yellow. I personally believe that they taste better.  Huevos Rancheros, I decided, would be perfect. I fact, just last week, I had  received a box of California Grown Avocados-- courtesy of the Foodbuzz  Tastemaker Program.  I've been enjoying them a few different ways (which I will blog very soon).  All I needed was salsa, but my homegrown tomatoes aren't ready.  Pioneer Woman to the rescue! Fortunately, I stockpile canned tomatoes in all size, shapes and flavors.  You need a 28 ounce can of tomatoes, a can of Rotel Tomatoes-- which I didn't have. I simply added minced mild green chilis, which are a pantry staple in my home. A food processor makes this a breeze to make:

You also need onion, fresh jalapeno, fresh cilantro and a garlic clove.  If you've never worked with jalapenos, just remember a few things-- the membrane holds all the heat. Remove the seeds, too, and wash your hands! If you accidentally rub your eyes, you will be very sorry! If you hate cilantro (Chinese Parsley), leave it out. Thankfully, we love cilantro and grow it in my own backyard.

Toss all of your ingredients into the food processor. Add 1/4 tsp of cumin (or more, if you wish), a pinch of sugar and salt, and fresh lime juice.  I coarsely cut the canned mild green chilis and then pulsed these ingredients about 3 times-- we don't want puree!

Now add the undrained tomatoes and pulse this a few more times. Taste with a tortilla chip. Mine needed more salt. Yummy!
TASTING NOTES: I see no reason for me to buy salsa in the deli section nor jars at the grocery store.  This is much easier to make, and you can adjust the "heat".  1 whole jalapeno gave this some kick.  1/2 jalapeno would be more my preference, but my boys like it hot. If you want mild,leave out the jalapenos, altogether but don't skip the minced green onion. If you have Rotel tomatoes (which are tomatoes with mild green chili peppers, and some seasonsings) that works, too.  Salsa is ready. Next, you need eggs, a can of black beans (drained and rinsed), corn tortillas and cheese. I used Cotija cheese.

I lightly cooked each tortilla in a little vegetable oil, until soft. Then I drained and patted it with paper towels.
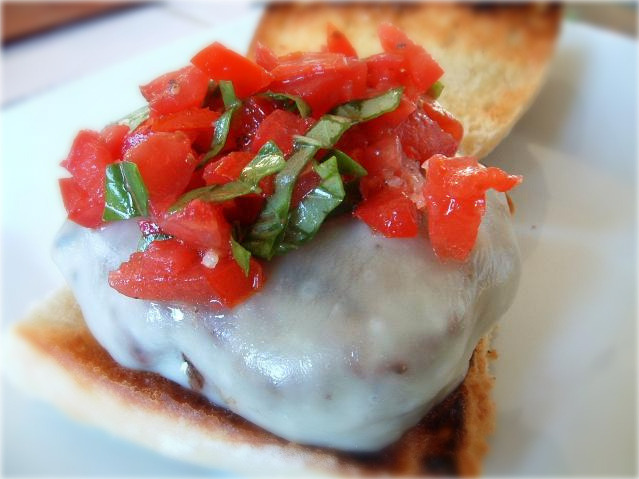
Now for those lovely eggs-- sunny side up.  To the black beans I added a bit of chicken stock to make them a little moist,  and mashed them just a little bit-- or, you could puree them.  Since the salsa has kick to it, I didn't season the beans. Let's build it-- layer 2-3 corn tortillas. Next, some beans and a little bit of Cotija cheese. I decided to broil it for about 30 seconds, to melt the cheese. Next the salsa, then the eggs.  Sprinkle with a little more cheese and slices of avocado.

We were so hungry that I didn't photograph the egg-- which was cooked perfectly, with just the right amount of beautiful yolk.  I've provided printable recipes for the Huevos Rancheros and the Homemade Salsa, at the very bottom of this post. I hope you'll try this. We loved it.  I'm submitting this recipe to my sister blog, "Foodie Fans of the Pioneer Woman", since Ree Drummond inspired me to make my own salsa. It's so easy!  .


I was supposed to publish a round-up, today, but...well, I'm distracted by a four-legged creature that I've owned for 26 years.  I'll publish it in the next day or two. I promise!

I'm looking forward to spending more time with my horse-- and more fresh farm eggs wouldn't be so bad, either!

Happy Summer!


Restaurant Style Salsa, adapted from The Pioneer Woman

After making this very easy recipe for salsa, I will ...

See Restaurant Style Salsa, adapted from The Pioneer Woman on Key Ingredient.


California Black Bean Huevos Rancheros

When I was gifted with a dozen farm fresh eggs ...

See California Black Bean Huevos Rancheros on Key Ingredient.

Sunday, May 30, 2010

Grilling Season Family Favorites

Tomorrow is a holiday that has been marked as a time to remember our fallen soldiers-- men and women-- who have given their lives for our country.  Second to that, it's a time for us to officially remove our winter covers from our Weber or gas grills.  I am so enjoying grilled steaks, chicken, salmon and vegetables.  I thought I'd share with you some grilling recipes, side dishes and desserts that I plan to make for my family-- now that the late California rains have stopped and we are enjoying 70 degree weather. Perfect.  The photo you see, above, is Santa Maria Style Tri-Tip-- which is one of my top viewed recipes.  Next to brisket (which I have yet to master grilling), this is my husband's very favorite grilled meal of all time.  Is this a little to rare for you?  Just cook it a bit longer!  I love this best between two slices of grilled bread with a schmear of mayo and Dijon. If you like the flavor of garlic, this recipe is for you! 

Ina Garten's Butterflied Grilled Chicken  (Spatchcock chicken) -- juicy & flavorful. 

It's a little too early for my homegrown tomatoes to be ready, but when they are...

Bruschetta Burgers are just around the corner!

Mmmm, Grilled Chicken Teriyaki Burgers with fresh pineapple rings.  I also show you a pretty cool gadget that makes slicing pineapples really easy.  How about some side dishes?

If you want break away from traditional American potato salad, with mayonnaise, my mother's German Potato Salad will be a hit at your party. 

This Antipasto Salad feeds a crowd, and isn't too complicated to make.  The quick marinated mushrooms are out of this world-- don't bother with buying these in a jar. I could have eaten a huge bowl of these, all by myself!

This classic Broccoli salad is a sure hit!


Strawberry season is in full swing This beautiful salad is a tribute to our locally grown fresh spinach, too.  The poppy seed dressing is out of this world-- one of my very favorite dressings.  I also use it as a slaw dressing. So good!

I'm going to be making the Pioneer Woman's Cheesy Garlic Bread, tomorrow, for two reasons-- #1 this is one of my earliest photos (before I discovered my macro button and natural lighting) and #2 This is the best garlic bread ever-- fattening as all get out, but delicious!  I want to take new photographs that will do this recipe more justice.

Cook's Illustrated Strawberry Cream Cake will be our weekend dessert. So good!

 Just click on each recipe name, and you will find the printable recipes.  Happy Grilling!

I hate to cut this round-up short, but my horse is twenty minutes from arriving at her new ranch.  I haven't seen her for nine months, so I am going to race out the door with a bag of fresh carrots for Savannah Sue.  I'm so excited!  Enjoy your weekend, everyone!  I know that I will!

A very happy,

Monday, May 24, 2010

Eggs in Baskets with Candied Bacon & Eggland's Best Picked me as a Grand Prize Winner!

Last week, I had a very unexpected surprise sent to me via an Email from Foodbuzz.  Last February, I redeemed a coupon for a dozen eggs from Eggland's Best Eggs, that was sent to me as part of the Foodbuzz Tastemaker Program.  I was delighted, because I love their eggs. Truthfully, I do pay a little extra when it comes to buying eggs. I really can taste the difference as compared to commercially inexpensive eggs.   I decided to make Eggs in Purgatory, which turned out to be healthy and delicious.

I  uploaded the photos of my dish onto Eggland's Best's Foodbuzz Web page, and that was that.
Three months later, the email said that  I won the Grand Prize from Eggland's Best!  I've finally been given the green light to announce this, since it's now posted.  What did I win? I'll tell you, after I share with you another egg recipe that I made with-- what else-- Eggland's Eggs.  I was inspired to make this while channel surfing, and I caught a Food Network show that I rarely watch (not enough time in the day). The show is called "Cooking for Real" and I decided to improvise a bit. 'Nuff said, let me just show you:
 Instead of using Prosciutto, I decided to make Candied Bacon.   My family is very happy (and greedy) when I make this. If you've never tried this technique, you will thank me if you do.  The saltiness of the bacon, with a brown sugar glaze coating... even I-- the not-so-wild-about-bacon-person has a hard time resisting these. It takes about 25 minutes to make these, so I started these in the oven, first.  Once they were finished, I let them cool a bit, and chopped them...

Make extra.  Trust me.  I had to fend off hungry hands from snatching these!


I love Yukon Gold Potatoes. You can use Russetts, but unpeeled Yukon Golds are my choice.  Using my food processor, these were quickly grated.  Squeeze all of the extra moisture with a towel (I like to use my potato ricer...it works great!  I grated a few too many taters, so I stored them in the fridge in some water. It works great! I decided to go for extra-virgin olive oil, rather than melted butter and I added salt & pepper, to taste.  Give it all a toss and now...you need a giant muffin tray, or you can use oven-proof ramekins.

  Spray the muffin tin lightly with nonstick cooking spray. Press the grated potatoes evenly into the muffin cups being sure the potatoes go up the sides and a thin layer and covers the bottom. Bake until the top edges turn light golden brown and the potatoes are cooked through, about 35 to 40 minutes.

 Shrinkage! These are ready for the next step...

Remove the potatoes from the oven and gently crack an egg into each cup. Bake until the egg whites set but the yolk remains runny, about 6 to 8 minutes.

 I decided to top the eggs with the chopped candied bacon.  Then, 


Top the eggs with grated cheese.  I used what I had in the fridge, but you could use Provolone.   Broil both until cheese melts,  about 1 minute. If using the Prosciutto, put that on the very top so it can broil along with the cheese. As for us-- I made extra candied bacon.  

Breakfast is ready!

The yolks are cooked exactly as we like them!  The potatoes were perfect for soaking the beautiful yolks.  The sweet & salt of the bacon was perfect.

VERDICT:  Awesome!  I'm so glad that I made the candied bacon. The Prosciutto and maple syrup combo sounds good, but I'm sold on the bacon bits.  In fact, the next day, I squeezed the water out of the leftover shredded Yukon Gold's from the fridge and...

 ...here it is in a ramekin.  You can view the original recipe here.

So, what did I win?  We'll start with one year's worth of Eggland's Best Eggs. Thanks!  Drumroll...
I also won a $500.00 gift certificate at any spa of my choice!  You cannot understand just how much I appreciate this prize.  You see, I am a (retired) licensed esthetician who owned a facial business and worked at spas for 15 years!  For once, I get to be the Princess and I get to be pampered!  After the wild week at work, since our students will graduate this Friday, I will be more than ready to spend a day in a massage room, with a nice manicure and pedicure.  Wow!

The printed recipes are at the bottom of this post.  I might be scarce for most of this week, but I'll do my best to share more recipes.  I'm behind in visiting my blogger friends, but I'll catch up!  I miss y'all!

A very happy,


Eggs in Baskets with Candied Bacon Bits

Delicious baked eggs in a nest of Yukon Gold Potatoes ...

See Eggs in Baskets with Candied Bacon Bits on Key Ingredient.

Candied Bacon

This is my family's favorite way to eat bacon ...

See Candied Bacon on Key Ingredient.


Tuesday, May 18, 2010

Perfectly Seared Scallops & Pasta, adapted from Steamy Kitchen

Today was one of those days-- the kind where I'm driving home, from a hard day at the office, and I dread the thought of coming home to cook.  Then again, I didn't want to go out to eat because we're tightened up our budget a bit-- we recently bought the house we've been living in for a few years. While we don't regret our investment, we're a little cash poor for a while. With that said, I resigned myself to trying to figure out a recipe that would be quick and didn't require a stop at the grocery store.  I did a mental inventory of my freezer...frozen scallops!  I remembered seeing Jaden Hair's recipe for Scallops & Pasta that she posted on Tasty Kitchen (The Pioneer Woman's recipe blog for her fans). Thawing scallops is easy-- I soaked them in a little water for about 20 minutes and patted them very, very dry.  Trust me, this is a very important thing to do:


These are giant scallops that I bought at Costco, several months ago. They're reasonably priced.

Be sure to remove the "foot".  It's easy to spot, because it separates very easily from the scallop.  If you forget to do this (which I have), it's a bit chewy.  Pat the scallops again, because you want them very dry.  Otherwise, you'll end up "steaming" the scallops, and that's not as pretty or tasty as a golden sear.  There's some prep work to do:


Start a  pot of water to boiling, and you'll need some pasta-- spaghetti, linguini, angel hair.. whatever you have. I have a weakness for collecting pasta from Trader Joe's. This one looks good!  Salt the water and cook according to package directions.

Chop a tomato-- I used Romas, because I think they're perfect for cooking. Mince some garlic, and I decided to mince a shallot.  Rarely do I not have shallots on hand. I love them, and I use them often.   Now, we're ready to make dinner in no time, flat!  Salt & pepper the scallops on both sides...

Now, here's the second key point to searing-- ready?  The skillet has to be fire-engine red hot! Hot, hot, hot!  That's when a cast iron skillet comes in handy.  I added some olive oil and then put those scallops in the hot pan, giving them some space.

Can you hear it sizzling? Do not touch these for two minutes. Otherwise, bad things will happen!

This shot is out of focus, sorry. It was hard to hold the tongs, when I'm right handed and to focus -- and I forgot to turn on the macro.  Still, I wanted to show how I checked after two minutes-- perfect! Now flip them over.

I liked Jaden's tip to flip the scallops over and to move them towards the center. See those brown bits? Flavor! Remove the scallops, and set aside.  Time to finish off this dish.

I like to use Sauvignon Blanc or Vermouth for cooking...

 I did things a little backwards from Jaden's recipe-- I added the white wine, followed with some chicken stock (you could use all white wine or all chicken stock).  From there, I added the fresh garlic and shallots and let them cook for less than a minute-- then I added the fresh tomatoes for about 30 seconds.  Last, I added the drained pasta.  Jaden's way was to add butter to the skillet, then the garlic and tomatoes and then the wine...whatever floats your boat.

This is fast food, my way!

We grow our own basil, so I picked a few fresh leaves-- rolled them up like a cigar, and then sliced them into a chiffonade.  Do this at the last minute, as fresh basil will turn dark.

There you have it-- perfectly seared scallops.  These were sweet and very tender.

VERDICT:  I need to make scallops more often. This recipe would work well with prawns, as well. My husband-- who crinkled his nose at eating scallops--  said they were delicious!  He was impressed at how tender these were-- seafood fillet mignon. I had a glass of chilled white wine, and I was very happy.

The printable recipe is at the bottom of this post.  The beauty of this dinner is that I can put my feet up and relax.  We saved a lot of money by not going out to eat, yet I feel this dish was restaurant quality. Thanks Jaden!

The Steamy Kitchen Cookbook: 101 Asian Recipes Simple Enough for Tonight's Dinner 

By the way, I bought her debut cookbook, and I look forward to learning how to cook more Asian recipes. Her photos are great!

This is a keeper!

 I am submitting this dish to Presto Pasta Nights, which is being hosted by The Crispy Cook


Scallops 'n Pasta, adapted from Steamy Kitchen

The secret to getting a beautiful sear on scallops is ...

See Scallops 'n Pasta, adapted from Steamy Kitchen on Key Ingredient.